>> Download this mini tut as PDF, [HERE].
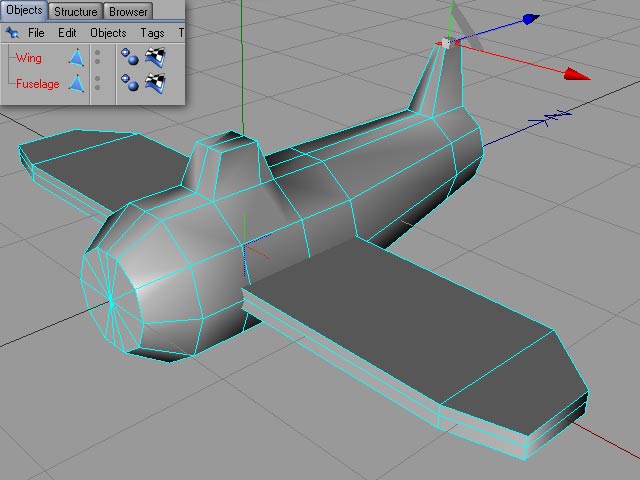
(1) Finished model - We have finished your awesome model and now we need to UV-map it in order to texture it properly. Our
simple example consists of two parts; the fuselage and the wing.
- Model a simple object similar to the one shown in the picture (or download this model, but already mapped. See link further down).
- Cut the fuselage in the middle - in this way you easily can individual select its right and left sides later on
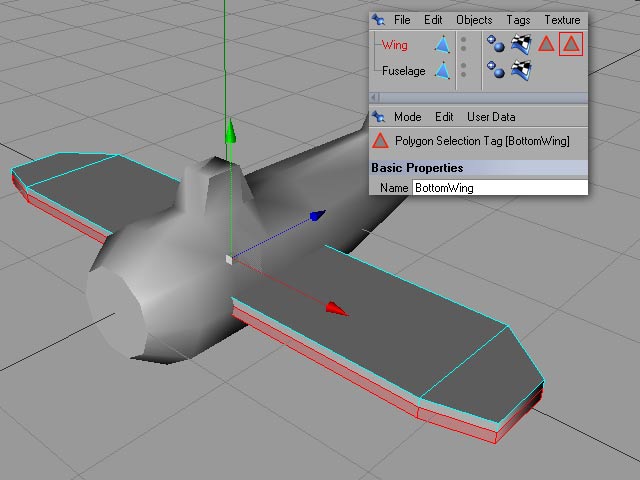
(2) Create area selections on the wing
- Select _all_ polygons on the wings upper side
- Set a selection tag (click on "set selection" from the "select" menu). A red triangle (selection tag) appears next to your object. Name the selection tag "TopWing"
- Invert your selection (now all polygons on the bottom side should be selected)
- Click somewhere on the wing object (or somewhere else to deselect the "TopWing" selection tag - otherwise you will over write it in the next step).
- Set a 2nd selection tag on the wing object and name it "BottomWing"
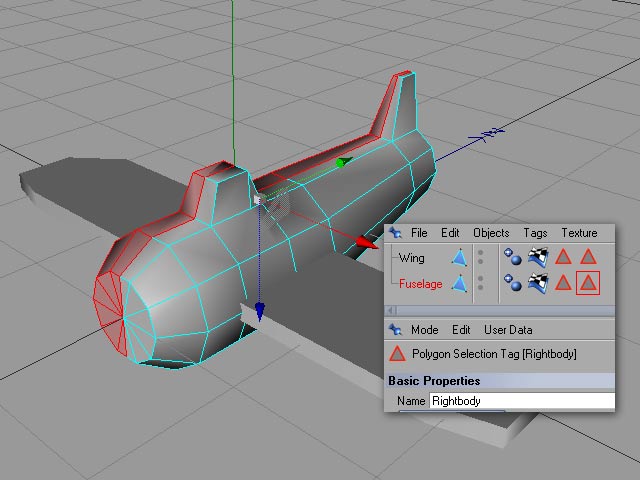
(3) Create area selections on the fuselage
- Select _all_ polygons on the fuselages left side
- Set a selection tag (click on "set selection" from the "select" menu). A red triangle (selection tag) appears next to your object. Name the selection tag "LeftBody."
- Invert your selection (now all polygons on the right side should be selected)
- Click somewhere on the fuselage object (or somewhere else to deselect the selection tag - otherwise you will over write it in the next step)
- Set a 2nd selection tag and name it "RightBody"
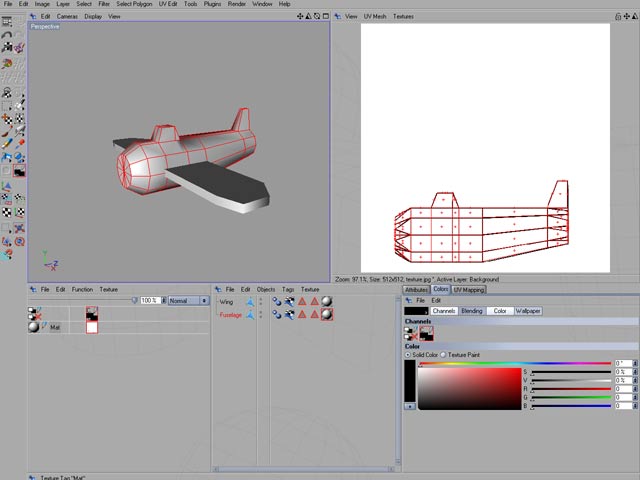
Now before we go to the next step and start with the actual mapping we need to have a blank texture to outline
our UV-map on.
- User your 2D paint program (I recommend Photoshop or the GIMP [free!]) and create a blank white jpg and name it "texture.jpg".
- Create a new material in C4D using the blank image as color texture.
- Apply the material on _all_ objects.
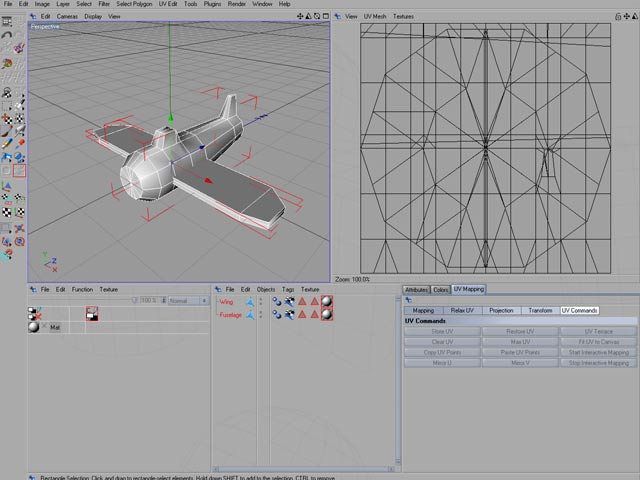
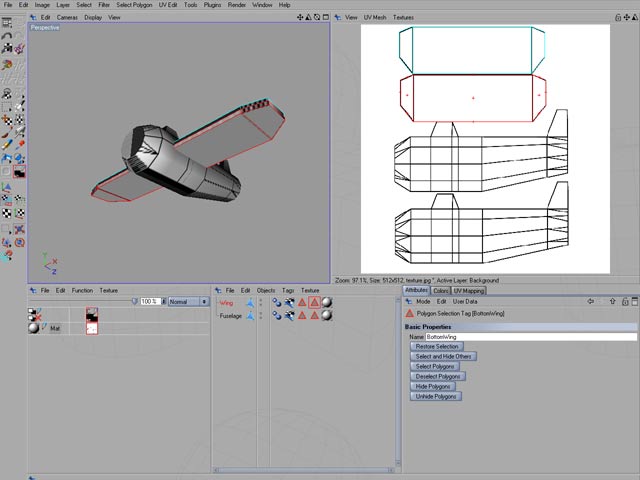
(4) Begin UV-mapping
- Switch to UV-Edit mode (by selecting this option from the layout menu. Top left icon in this image)
- Select the fuselage
- Select "Show UV-mesh" from the "UV-mesh" drop down. Things look like a mess and we now have to sort it out.
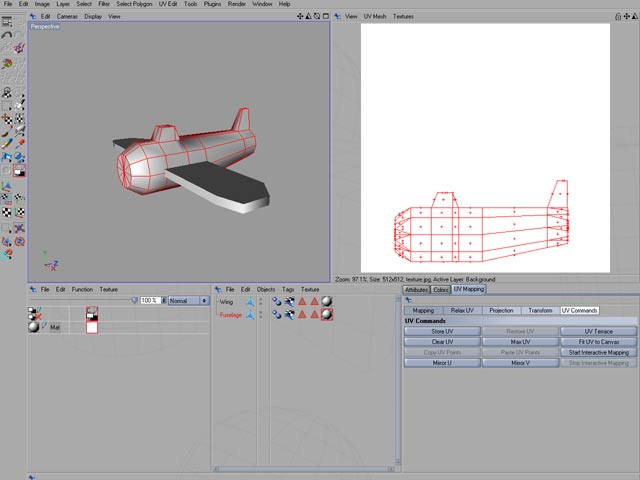
(5) Work with the fuselage
- Right click on the texture/material and select load texture (the texture now also apperas in the top right 2D view)
- Click on "Use UV-polygon Edit Tool"
- Select _all_ the polygons of the fuselage
- Click on the "UV Commands" flap
- Click on "Start Interactive Mapping"
- Rotate and scale the UV-map until you see it from the side like in the above image (use rotate and scale tools and work in the 3D-workspace to the left).
- Click on "Stop Interactive Mapping"
- Don't deselect!
(6) Create outline
- Select the brush tool
- Set the brush size to 2
- Select a dark (black) color for the brush
- Click on "Use UV-polygon Edit Tool" again
- Select "Outline Polygons" from the "Layer" menu (this carbon copies the polygons onto your texture)
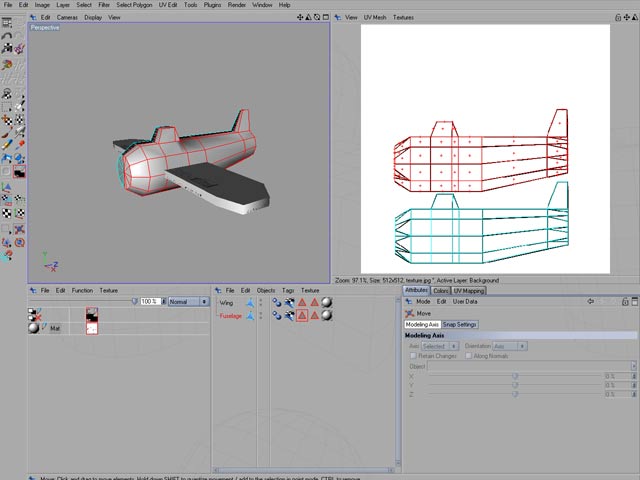
(7) Map the right side of the fuselage
- Double click on the selection tag you named "RightBody" (this selects the polygons on the right side of the fuselage)
- Click on "Use UV-polygon Edit Tool" again
- Click on the "Move tool" and move the selected polys up into position as shown in the image above (work in the 2D-workspace to the right).
- Select "Outline Polygons" from the "Layer" menu.
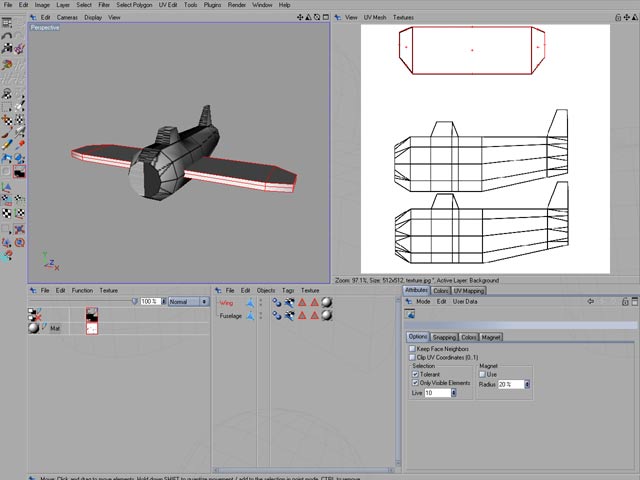
(8) UV-map the wing
- Select _all_ the polygons of the wing
- Click on the "UV Commands" flap
- Click on "Start Interactive Mapping"
- Rotate and scale the wings UV-map until you see it flat from the top like in the above image.
- Click on "Stop Interactive Mapping"
- Don't deselect!
- Select the brush tool
- Click on the "Use UV-polygon Edit Tool" again
- Select "Outline Polygons" from the "Layer" menu
(9) Map the bottom side of the Wing
- Double click on the selection tag you named "BottomWing"
- Click on the "Move tool" and move the selected polys into position as shown in the image above (work in the 2D-workspace to the right)
- Don't deselect!
- Select the brush tool
- Click on the "Use UV-polygon Edit Tool" again
- Select "Outline Polygons" from the "Layer" menu
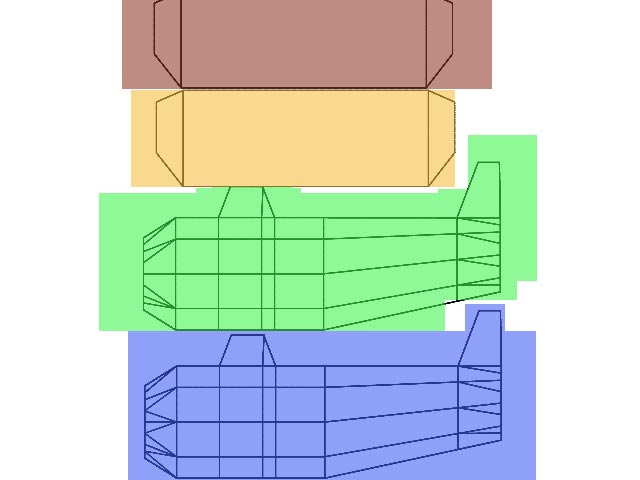
(10) Saving the UV-map
- Now we're done with the mapping!
- Save your project and "texture.jpg" will be updated with the oulined polygons
- Open texture.jpg in your 2D painting program and paint your texture so it fits your UV-map (I've painted it transparent just so you can see what I mean)
- Save the painted texture (I would recommend keeping a backup of the original)
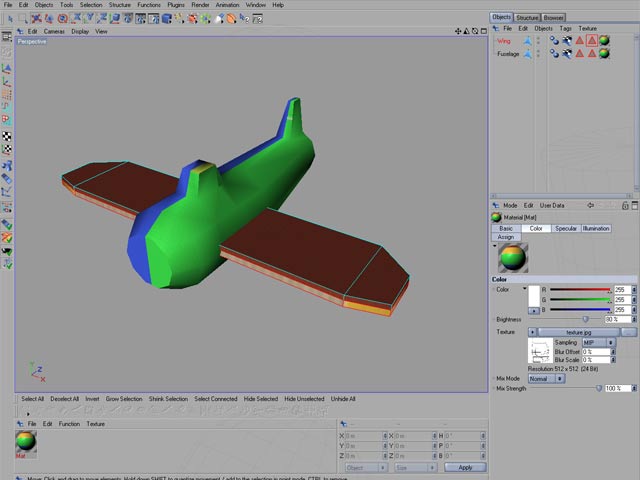
(1) Finished
- Reload the image you have used as texture.
|